SOCIAL MEDIA

Tuesday, June 26, 2012

Do It Yourself No Sew Table Runner

I love table linens. I get that gene from my mom who has closets full of gorgeous stuff...cotton, silk, plain, patterned and so on. The difference is that she actually is a table designer - me, I just want my stuff to look marginally put together.

Sometimes, I can be pretty crafty. I'm no great crafter or anything, but sometimes, I'll crank out something that even amazes myself. Today was one of those days! I was humming a great song, "Wonderful Wonderful" by Johnny Mathis (included here) and texting a buddy who has a wicked sense of humor all while being quite deft with the stitch witch!

Anyway, hopefully I haven't left out any steps. It really is wicked easy to make and you can use the same steps to make a table cloth as well. My only suggestion is wash on the gentle cycle and line dry this little DIY - NSTR!

For your table runner you'll need:

2 yards of fabric
4.5 yards of ric rac or trim
3/8 in. width heat bond
1/4 in. width heat bond
fabric scissors
hot iron

 Step 1: Choose your fabric and gather your materials.


Step 2: Cut your desired width. I like a pretty standard runner width. Your preference may be a bit wider or thinner depending. Be sure that you are cautious; try to cut as straight as possible.


Step 3: Make sure the iron is hot. Iron all folds and creases from your pattern before you begin; that will ensure a neater more polished look. 


Step 4: Fold and iron your hems at about a 1/4 inch thick or so all the way around your runner.


Step 5: After your hems have been heat set with the iron, place your heat bond under the crease. Moisten the fabric with the sandwiched stitch witch and iron until the water has evaporated and the hem is stuck. If you aren't sure if the heat bond worked...try gently tugging at it. If it does not resist, re-iron. If it doesn't budge - success!


Follow step 5 around all four sides.


Step 6: Mitre the corners. (This is my least favorite part - mostly because I stink at it.) Make a small triangle at the corner as shown in the picture. Place a small amount of the skinnier heat bond under the corner and press it with the iron for several seconds.


 Step 7: After you mitre the corners, fold the fabric into a new hem and add the heat bond under the folded new hem as shown in the photo.


Your finished mitered corner should look similar to the one below.


Step 8: After you've hemmed your corners with the heat bond, flip your nearly complete runner over. Place your trim on the runner where you think it looks even.


Make sure you have some over hang...


Step 9: Put your heat bond on the runner where you have placed the trim (move the trim out of the way first. It usually works better that way). Then replace the trim on top of the heat bond. Moisten with a spray bottle and press with hot iron. Do this on both sides.


Step 10: After you've affixed your trim with the heat bond, turn over the runner and adhere the excess trim to the underside to create a finished look. 


Your finished trim should look like the photo below. And...
     

VOILA! 


You've just completed a table runner/tablecloth in 10 easy steps and never had to fuss with a sewing machine! 


Hey readers! If any of you make one of these, please email me photos! I'd love to see your stuff!

Wait! You thought you were done? Don't forget Johnny Mathis...This is the catchiest tune I have perhaps ever heard and I love it!


Dedicated to my very loving and really handsome husband. Woo hoo! I won the husband JACKPOT!

Friday, June 22, 2012

Instagram

There is a lot of "social media" out there. For instance, we all know about the book and the bird. And, by now, if you follow me here, you know about my love affair with (along with millions of others) The Grand 'P'! But, if you haven't hooked yourself up with the jolly wee camera, Instagram, I suggest you see what it's all about.

Instagram is a photo sharing website/application for Android and the iphone. I'm hooked and like most, I have my "favorite players." Following are a few things you might find there. These are several folks I love to follow because they have interesting photos to share with the world.

The first photo is my own. It is a halved walnut, still in its shell...hm...pinned to "The Shape of Love" on Pinterest as soon as I finish this post, I imagine! You can view more of my photos by following the link in the sidebar or you can connect with me here.


The next photo is by Tea Tree Vintage. So much variety in her photos,  a sweet Etsy store, a wonderful blog and a charming person all around...go see Tea Tree Vintage and follow her on Instagram!


What an excellent photo. I think there was an event at the Bowery Hotel in New York City...and a giant rain storm...just a guess. I follow newyorkcity because of shots like this.


Cxcart is perhaps one of my favorites. I find myself liking a tleast one photo of his everyday. The second photo here he titled, "Door Porn." I responded with, "Shutter porn, brick porn and window box porn."


Delbarr Moradi is best known for her wedding photography. I have featured her on La Bottine and since then have followed her on Instagram too. Look at that cute doggy! He matches the decor quite well!


I'd really love to hop down to the local bookstore and buy this off the shelf. Alas, they are only on their fourth edition of this sweet little independent magazine. Betty is a UK indie glossy with fashion advice and DIY stuff but, in their words, you'll never find diet advice! And that is why they are so nice to follow!


 And finally, johnbarnett! He captures amazing imagery and often uses the iphone app he cooked up called Wood Camera. John is no amateur he's the former TwitPic Media Director and photographer extraordinaire. I have recently downloaded the Wood Camera App but have yet to use it...


Friday, June 15, 2012

A New Blog for My Dailies

I love love love to run around and see other bloggers online real estate. I think its a great way to learn about new trends in lifestyle, new cleverness in interiors and interesting techniques in cuisine, among other things.

This weeks find is a blog I found by screwing around on Instagram. It's called Mint Love Scial Club. Besides the awesome title, it's written by a young, fashionable woman who has a got her finger on the pulse of coolness. She provides us with excellent drink recipes (I've tried a few!), very useful and fun DIY projects and a home tour that is on Apartment Therapy! But where am I going to categorize her? She has everything!

I love to visit the Mint Love Blog because I want to do some of the things she's done. Not terribly creative but why re-invent the wheel? So in the next few weeks look for our house tour and a cocktail recipe that I call The Ccicero and another I call the Velvet Hive. I'm also coming along with a new 8tracks mix and will be doing a giveaway (hair products) from Mosaic Salon!

Meanwhile check out some of the stuff she has...

She includes Gastronomy(me too). Donuts made using a donut pan. So sweet and an excellent photo. My mouth is watering! Go see the whole post here!

This photo is quite cool and has such clarity, my goodness! She took it herself in a step by step to make her Hibiscus Champagne Cocktail. The recipe follows....

This is one of the most clever DIY's I've ever seen, and I've seen some. As a crafter a "creative" person never reveals their sources, but I just can't keep this one to myself. In fact, now I want to have a dinner party too! These are "Faux Polaroid Placecards!" Perhaps I can put the directions here? Nah. If you'd like to make these for your next venture in entertaining get the directions right here.


Wednesday, June 13, 2012

Ridiculous

Well....I'm quite ridiculous. I want to be taken seriously as a blogger as I have so much to say and to share with you guys. I'm also very sorry for being absent from posting for so long. 

Wedding season is upon us and since my trip to Disneyland, I've not had even one second to myself save for sleeping. So here I am back in the saddle at least for this post today...

I sometimes read a design blog called Coco and Kelley. Cassandra recently wrote that at an even for a wedding she was called "ridiculous." She also said it was one of the best complements she's ever received. I wish I had had the mind enough to (when it happened) see the same, because it's true! Go and read her story which is warming to the heart and soul and gives us all a little fortitude! I have a similar story.

On the day of my rehearsal dinner, I preened in the mirror, anticipating the next couple of hours and looking forward to the following day. I had designed a red strapless dress in silk satin which was embellished around the hem with black feathers. Before the rehearsal/wedding (in July) my mother, for my birthday (in October) gifted me a wicked pair of Hale Bob slides. 

Yeah. They were different, but how lame and boring life would be without things that are different, unusual, fun, inspiring and so on...

I wore these fantastic shoes with the red dress. And how were they met? Not with the applause I had imagined in my head. Instead, they were the draw of ridicule...Yup. They were exclaimed to be "ridiculous." Cassandra was pretty inspirational on her blog post and I was pretty moved by it, not simply because I had a parallel story. Oh no, nothing that simple. I was moved because of the way she handled the situation with grace followed by a smile.


Monday, May 28, 2012

Frabjous Finds - Fawning In Love


'It seems very pretty,' she said. 'Somehow it seems to fill my head with ideas—only I don't exactly know what they are!" Alice in Wonderland 

Frabjous: Possibly a blend of fair, fabulous, and joyous. Definition from Oxford English Dictionary, credited to Lewis Carroll.

I love Alice's sentiment. Sometimes you encounter something or someone that is extraordinary. In that case what else can one say about whatever that je ne sais quoi is....Frabjous hits the nail on the head.

I was very lucky to come across Fawning In Love. I was looking for a very specific hair comb to wear in my hair for an upcoming wedding in which I am a bridesmaid. I want to represent my husband and I as I stand up for a very close friend. Our theme was "Birds of a Feather Flock Together." I found it! And I ran around the house yelling to my husband that I'd come across a Frabjous Find. Perhaps what prompted me to purchase from her were her excellent photographs, or the sweet packaging, or that everything is so reasonably priced. In any case I was overjoyed by this little present.

Laura, the shops owner, isn't any old handmade maven. She is a real professional and that was clear upon the receiving of this wee ditty. I've  a story to tell about the adventure that has been my experience with Fawning In Love.

I ordered a little gold hair comb that came with a little gold feather. The measurements were perfect - very small as I have baby fine hair. Wracked with excitement, I paid via paypal for my treasure. And then...I waited. The comb, having never showed up seemed to have gone missing in transit. I messaged Laura on Etsy, she took great care to rectify the error, immediately. Two days later, after rush delivery, my hair comb arrived. She was prompt, professional and warm. 

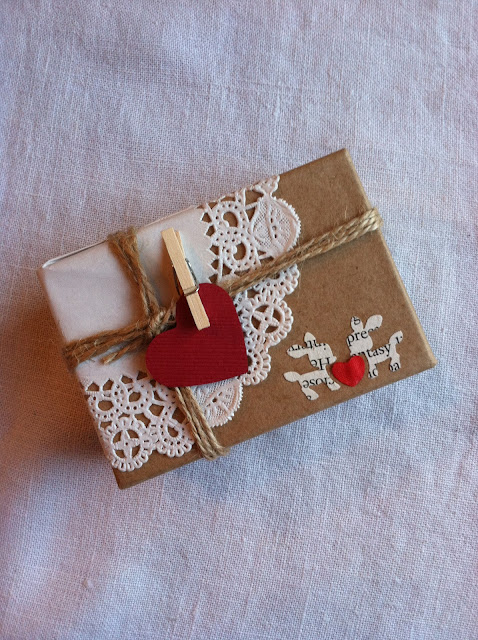
Her crafting doesn't stop at her accessories. Look at the sweet wrapping...It is because of her above and beyond talent that I've decided to feature her on Frabjous Finds! You'll want something from Fawning in Love, too. I promise! 


Impeccable details...

And look what other extraordinary things she offers in her shop...


Friday, May 25, 2012

In Search of Mickey - Manicures...

I am a hand person. I just am. Always have been.

My Granny has Barbara Streisand hands. Yup. "Like Butta!" She, at 93 is always coiffed, designer dressed and impeccably manicured. Because of her fastidious way of keeping herself up for, ahem, nearly a century, there are certain things that I have picked up from her.

Sure I love art (Gran), and dogs (Gran) and I'm being as modest as possible here, I love a good game of cards as in, I'm quite the shark (Gran). But, perhaps the weirdest thing I picked up from Fay (gorge name, right!?) was her love of a good set of fancified 10's! Oddly, It's one of the things that I was so attracted to my husband for...his hands are really attractive in a masculine but not callused way!

I am going to "The Happiest Place On Earth!" on June second and I got a manicure yesterday. I had a design all planned out and figured it would be easy enough to do. But, nooooooo! Here's how it went. I told "Kimmy" about my trip to Disneyland. I picked my colors (Ink Gels in Barbie Pink and Dark Glitter Grey) and told Kimmy to paint all nails the pink except my accent nail which I wanted grey. Then I explained to her that I wanted my accent nail to have a silhouette of Mickey's head on the accent nail in the pink. She tried hard enough. But it was a no go. So, I looked up other Mickey designs to see how hard it is to get this done or to see if anyone else had done something similar. I found a great blog that has all kinds of excellent nail designs, not just Mickey Mouse...

If you're interested in some spicy nails, the place to visit is Holy Manicures! Margaret is a manicure maven. She is uber talented and clever to boot.

Following is her rendition of the Mickey Manicure. It's delightful! I wish I could tell my manicurist how to do the Mickey silhouette on my finger! I've written a note to Margaret so perhaps she can help me?!


And I found a few others on her site that i really liked...


How does she do it?!


Here are some other Mickey/Minnie nails...

Mad Mani's


source

I'm going to publish this without the mickey on my accent nail...bummer. But it is my aim today to get a pink Mickey on there. And when I do I'll edit in the new picture with the complete nails!


Yeaaaay! Finally! I got my Mickey...I got it at GG Salon on Alhambra. A woman name Heidi did it for me. I feel complete...and gues what? I leave today (June 2nd) for the mouse with sissy!

M-IC-K-E-Y M-O-U-S-E